|
You are here : Stores and Inventory > Stores and Inventory Maintenance > Negative Material Adjustment Voucher
Negative Material Adjustment Voucher
|
There is a high possibility of variance between the actual physical
stock and the logical stock provided by the system due to various reasons.
When the physical stock is less than the logical stock provided by the system, Negative Adjustment of the material can be done at any point of time through this option.
| Integration with Finance Module
|
|
Being a truly integrated software, IMMS automatically updates Finance related transactions associated with the Material Adjustment. But this update depends upon the setting of the 'Authorization Required' flag through Document Control Master option in Administrator Tools Module. If this flag is 'Yes', than the update is done after the Adjustment Voucher is authorized through Negative Material Adjustment Authorization option. If this flag is 'No', than the update is done immediately after the Adjustment Voucher is saved. The update is done as follows -
- Material Account is Debited
- Adjustment Account is Credited
|
A list of already generated Negative Adjustment Vouchers will be displayed as follows -
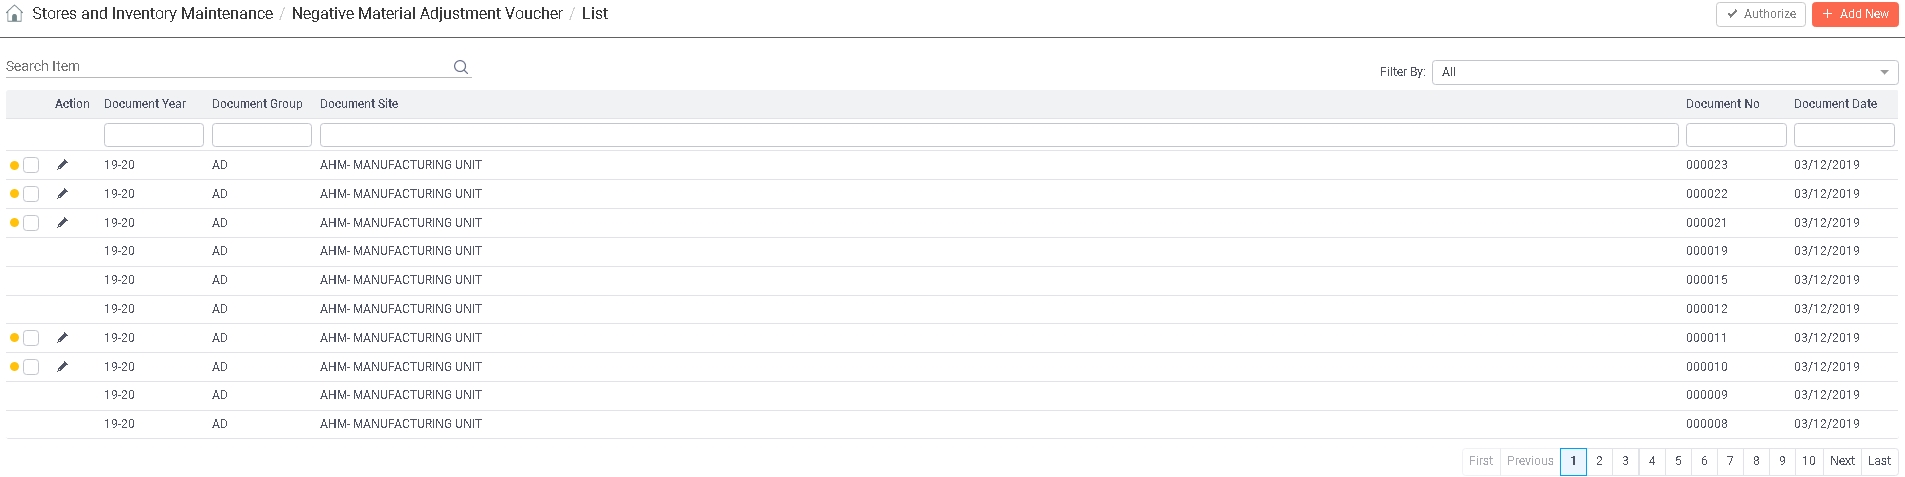
Search:
Enter any text you want to search in the list below. The search is applicable to all columns of the list. Once the text is entered, press <ENTER> key. As a result, the list will be refreshed with all those records that contain the entered text fully or partially. In order to go back to the original list, remove the text from the box and press <ENTER> key again.
Filter By:
IMMS provides the facility to filter the records on the basis of their status. Click on the field and select either 'All', 'Authorized' or 'Pending for Authorization'. Selecting 'All' will display all records, authorized as well as unauthorized. Selecting 'Authorized' will display only authorized records. Selecting 'Pending for Authorization' will displays only those records that are yet to be authorized.
|
Once a Negative Material Adjustment Voucher is generated, it may or may not need to be authorized.
Authorization of Negative Material Adjustment Voucher is a flag driven option. Therefore its availability depends upon the setting of the 'Authorization Required' flag through Document Control Master option in Administrator Tools Module.  Read more... Read more...
If the flag is 'On', it becomes compulsory to authorize Negative Material Adjustment Vouchers after they are generated. Once Negative Material Adjustment Voucher is
authorized, changes can NOT be made in it through Negative Material Adjustment Voucher option. This
prevents it from being altered by unauthorized people. To authorize a particular Negative Material Adjustment Voucher, select the corresponding record by clicking on the small white check box. You can de-select the record by clicking on the same box again. You can select multiple records in the same way. Once done, click on the  button to finally authorize the selected records. button to finally authorize the selected records.
If the flag is 'Off', once Negative Material Adjustment Vouchers are generated, they are
automatically authorized by IMMS irrespective of the user who has created
them.
|
 Negative Material Adjustment Voucher can be added, edited, deleted and viewed provided the Role associated with the currently logged-in user through User Management has the respective rights to do so.
To 'Add' a Negative Adjustment Voucher, click on the  button and to 'Edit', click on the
  icon on its corresponding record. Click on the
  icon to delete a particular Negative Adjustment Voucher. To view details of a particular Negative Adjustment Voucher, <DoubleClick> on that record. As a result, following screen will be displayed -
Screen Layout of Negative Material Adjustment Voucher

Field Description of Negative Material Adjustment Voucher
Year:
Denotes the year of Negative Adjustment.
In 'Add' mode, current financial year will be displayed by default.
You can NOT change it.
In case of 'Edit', and 'View' modes, financial year of the selected record will be displayed by default. You can not change it.
Group:
Specify the Group for the Negative Adjustment.
While 'Adding', please note that the Group which has been specified as default for the selected financial year through Document Control Master option in Administrator
Toolswill be displayed automatically.
You can change it by clicking on the field to access a list of
already defined Negative Adjustment Groups for the entered Year though Document Control Master option in Administrator
Tools Module. Select your desired Group from the list by scrolling
down to it and pressing <ENTER>. Alternatively you can also enter
the Group.
In case of 'Edit', and 'View' modes, Group of the selected record will be displayed by default. You can not change it.
Site:
Specify the Site for the Negative Adjustment.
While 'Adding', the Site if any specified with the selected Group will be displayed by default.
Click on the field to access a list of
already defined Sites. Select your desired Site from the list by scrolling
down to it and pressing <ENTER>. Alternatively you can also enter
the Site.
Read more about Site...
|
Please note that the Site(s) will be displayed/accepted as per the following conditions -
- In case the 'Site Required?' flag is 'On' through Document Control Master option in Administrator Tools Module, than only those Sites will be displayed which have been linked with the selected Year and Negative Adjustment Group.
- In case the 'Site Required' flag is NOT selected, than all the Sites that have been defined for the current Company through Site Master option of Administrator Tools Module will be displayed.
|
In case of 'Edit', and 'View' modes, Site of the selected record will be displayed by default. You can not change it.
Number:
(Type : Alphanumeric, Length : 6)
While 'Adding',
Negative Adjustment Number is either generated automatically or entered manually by the
user.
If the flag is 'On', a new Negative Adjustment Number will
be automatically generated by the system and incremented by one for current
financial year.
If the flag is 'Off', the User can enter a unique Negative Adjustment Number manually. The system also ensures that the Number entered is
a unique one.
|
In case of 'Edit', and 'View', Number of the selected record will be displayed by default. You can not change it.
Date:
While 'Adding'
a new Negative Adjustment, enter the Date of the Adjustment. Today's date is displayed by
default. You can change it but it can not be later than today's date or
Current
Period End Date. Press <TAB>.
Item Details
While 'Adding' a new Negative Adjustment
Voucher, an empty grid is displayed. You can start entering Items.
In case of 'Edit', and 'View',
Items belonging to the selected Negative Adjustment Voucher will be displayed automatically.

Click on the  button to enter more Items in the grid. A new row will be added
as a result.
button to enter more Items in the grid. A new row will be added
as a result.
Field description of the grid -
Some of the fields are for your
information purpose. You can enter data in following field -
Action
Click on the icon to remove a record from the list. Click on the 'Delete' icon again to un-delete the record.
Item Code:
Denotes the Item that has to be adjusted.
Click on the  icon to access a list of Items which have already been defined through Item
Master Basic Detail - Entry option in Materials
Module. Select your desired Item from the list by scrolling down
to it and click on 'Continue' button. Alternatively you can also enter the
Item. Press <TAB>.
icon to access a list of Items which have already been defined through Item
Master Basic Detail - Entry option in Materials
Module. Select your desired Item from the list by scrolling down
to it and click on 'Continue' button. Alternatively you can also enter the
Item. Press <TAB>.
- IMMS checks that Inventory related setting of the Item should have already
been done through Warehouse Inventory option. The help list will also display
only such Items.
- Scrap Type of Items will not be accepted/displayed.
|
You
can not select an Item that has been deactivated through Activate/De-activate
Master option in Administrator Tools
Module. The help will also not display such items.
Item Name:
Name of the selected Item Code is displayed automatically.
UOM:
Unit of Measurement of the selected Item as specified through Item
Master Basic Details - Entry option in Materials
Module is displayed automatically.
Warehouse Code:
Denotes the Warehouse in which the Item has been adjusted.
Click on the field to access a list of Warehouses associated with the selected Item through Warehouse Inventory option . Select your desired Warehouse from
the list by scrolling down to it and pressing <ENTER>. Alternatively
you can also enter the Warehouse. Press <TAB>.
You can not select a Warehouse that has
been deactivated through Activate/De-activate
Master option in Administrator
Tools Module. The list will also not display such Warehouses.
|
Please note that IMMS will not display/accept Scrap, Customer Supplied, Receiving and Rejection type of Warehouses for Negative Adjustment.
|
| If the flag 'Whether to allow Negative Adjustment in WH with Excise flag' is set as 'On' through Inventory Policy option of Administrator Tools Module, IMMS will display/accept Excisable Warehouse. If the flag is set as 'Off', IMMS will NOT display/accept Excisable Warehouse for Negative Adjustment. |
Warehouse Description:
Name of the selected Warehouse Code is displayed automatically.
Total Quantity:
(Type : Numeric, Length : 9)
Denotes the quantity of the Item to be adjusted.
Click on the field.
In case the Item is a non-Dimension Item and does not maintain Serial No / Batch No / Inward Batch No Read more...
Following grid will be displayed -

Onhand Qty:
Automatically displays the system generated On-hand quantity of the Item available for your reference. You can NOT change it.
Qty:
(Type : Numeric, Length : 9)
While 'Adding' a new Negative Adjustment
Voucher, click on the field. Now enter the physical quantity of the Item to be adjusted against the system stock. Press <TAB>.
In case of 'Edit', and 'View',
Qty of the Item of the selected Negative Adjustment Voucher will be displayed automatically. You can change it in 'Edit' mode.
Allocated Qty:
Automatically displays the Allocated Quantity of the Item for your reference. You can NOT change it.
Once entered, click on 'Ok' button to go back to the previous grid. The 'qty' entered here will be carried back to the previous grid and displayed in 'Total Quantity' field. Click on 'X' button to cancel and go back to the previous grid.
In case the Item is a Dimension Item and flag 'Dimension Wise Stock Keeping Required' is set to 'Off' for its Sub-Class through Class / Sub-Class Master option of Administrator Tools Module AND the Item does not maintain Serial No / Batch No / Inward Batch No Read more...
Following grid will be displayed -
Onhand Qty:
Automatically displays the system generated On-hand quantity of the Item available for your reference. You can NOT change it.
Qty:
(Type : Numeric, Length : 9)
While 'Adding' a new Negative Adjustment
Voucher, click on the field. Now enter the physical quantity of the Item to be adjusted against the system stock. Press <TAB>.
In case of 'Edit', and 'View',
Qty of the Item of the selected Negative Adjustment Voucher will be displayed automatically. You can change it in 'Edit' mode.
Allocated Qty:
Automatically displays the Allocated Quantity of the Item for your reference. You can NOT change it.
Once entered, click on 'Ok' button to go back to the previous grid. The 'qty' entered here will be carried back to the previous grid and displayed in 'Total Qty' field. Click on 'X' button to cancel and go back to the previous grid.
In case the Item is a Dimension Item and flag 'Dimension Wise Stock Keeping Required' is set to 'On' for its Sub-Class through Class / Sub-Class Master option of Administrator Tools Module OR requires Serial No / Batch No / Inward Batch No Read more...
Following options will appear on the screen -

Size:
This field will be displayed ONLY if the Item is Dimension Item .
Automatically displays the Dimension of the selected Dimension Item available in the selected Warehouse. You can NOT change it.
Serial No:
(Type : Alphanumeric, Length : 20)
This field will be displayed ONLY if the Serial Numbers are maintained for the Item. (Flag 'Use Item Serial No' for the Item is set as 'On' through Item Master Basic Detail - Entry option of Materials Module ). Otherwise this field will NOT be displayed.
Automatically displays the Serial No of the Item available in the selected Warehouse. You can NOT change it.
Manufacturing Batch No:
(Type : Alphanumeric, Length : 20)
This field will be displayed ONLY if the Manufacturing Batch Numbers are maintained for the Item. (Flag 'Use Manufacturing Batch' for the Item is set as 'On' through Item Master Basic Detail - Entry option of Materials Module ). Otherwise this field will NOT be displayed.
Automatically displays the Manufacturing Batch No of the Item available in the selected Warehouse. You can NOT change it.
Inward No:
(Type : Alphanumeric, Length : 20)
This field will be displayed ONLY if the Inward Batch Numbers are maintained for the Item. (Flag 'Use Inward Batch' for the Item is set as 'On' through Item Master Basic Detail - Entry option of Materials Module ). Otherwise this field will NOT be displayed.
Automatically displays the Inward Batch No of the Item available in the selected Warehouse. You can NOT change it.
Heat No:
(Type : Alphanumeric, Length : 20)
This field will be displayed ONLY if the Heat Numbers are maintained along with the Inward Numbers for the Item. (Flag 'Use Heat No' for the Item is set as 'On' through Item Master Basic Detail - Entry option of Materials Module ). Otherwise this field will NOT be displayed.
Automatically displays the Heat No of the Item available in the selected Warehouse. You can NOT change it.
Onhand Qty:
Automatically displays the available quantity of the Item for your reference. You can NOT change it.
Qty:
(Type : Numeric, Length : 9)
Click on the field.
In case of Dimension Item, a small box will be displayed with its Dimension Heads and their values as follows -

No. of Pieces: (Type : Numeric, Length : 4) Press <ENTER> on the field. Now enter the number of pieces required for the Dimension Item.
Weight:
Weight of the Dimension Item is calculated automatically on the basis of its formula entered for its combination of Material and Sub-Class through Formula Builder option in Materials Module. That product is further multiplied by the Density of the Item and the Number of Pieces entered.
where Density of the Item's Material is specified through Density Master option in Materials Module.
Once done, click on 'Ok' button. The system checks that the entered quantity can not be more than the On-hand quantity. Or else an appropriate message will be displayed.
If the entered quantity is permissible, the control goes back to the grid and 'Weight' of the Dimension Item generated here will be carried back and displayed in 'Weight' field whereas 'No of Pieces' entered here will be carried back and displayed in 'Qty' field. Click on 'Cancel' button to discard and go back to the previous grid.
In case of non-Dimension Item,
Enter the Quantity of the Serial No / Manufacturing Batch No / Inward No / Heat No of the Item to be adjusted. This Quantity can not be more than the 'Onhand Qty'.
Weight:
This field will be displayed ONLY if the Item is Dimension Item .
Automatically displays the calculated weight for the Dimension Item.
Allocated Qty:
Automatically displays the Allocated Quantity of the Item for your reference. You can NOT change it.
Once done, click on 'Ok' button. As a result, the control goes back to the main grid and sum of all Quantity will be carried back and displayed in 'Quantity' field. Click on 'X' button to discard and go back to the main grid.
Reason Code:
Denotes the Reason of Negative Adjustment. It is mandatory to enter the Reason.
While 'Adding' a new Negative Adjustment
Voucher, click on the field to access a list of Reasons
which have already been defined through Codes Master Entry (Code Type = 'RC') option in Administrative Tools
Module. Select your desired Reason from the list by clicking on it. Alternatively you can also enter the
Reason Code. Press <TAB>.
In case of 'Edit', and 'View', Reason of the selected Negative Adjustment Voucher will be displayed automatically. You can change it in 'Edit' mode.
Remark:
Denotes the Remarks for Negative Adjustment.
While 'Adding' a new Negative Adjustment
Voucher, click on the field.Now enter the Remarks if any. Press <TAB>.
In case of 'Edit', and 'View', Remark of the selected Negative Adjustment Voucher will be displayed automatically. You can change it in 'Edit' mode.
Value:
Please note this field will be displayed only in case of 'View' mode after the Voucher is authorized.
Automatically calculates and displays the Value of adjustment as 'Total Qty' x 'Rate' for your reference. It can not be changed.
Once you have entered all the information, click on 'Save'
button to save or 'Cancel' button to
discard. The control goes back to the list.
 in Administrator Tools Module. If this flag is 'Yes', than the update is done after the Adjustment Voucher is authorized through Negative Material Adjustment Authorization option. If this flag is 'No', than the update is done immediately after the Adjustment Voucher is saved. The update is done as follows -